Once you have installed and activated the Yatra Google Calendar addon on your WordPress website, follow these simple steps to set it up:
Step 1: Navigate to the Google Calendar settings tab
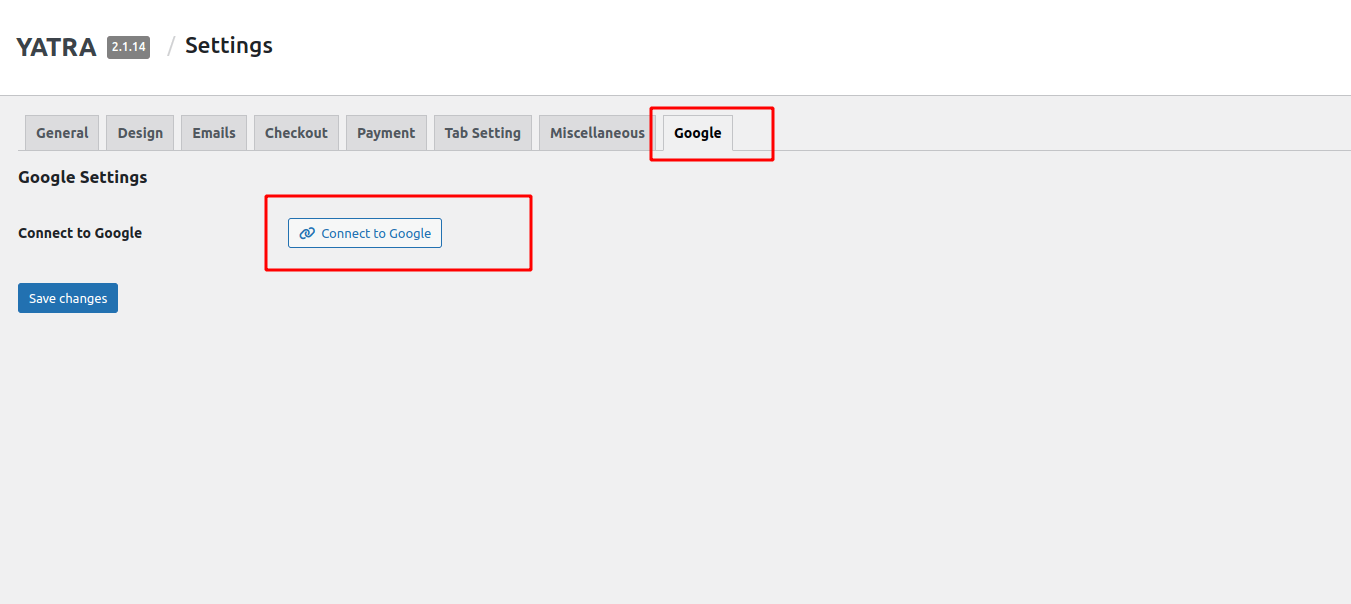
After activating the addon, go to Yatra -> Settings from your WordPress dashboard. You will see a new tab named “Google“. Click on that tab to proceed.
Step 2: Connect to Google
On the Google tab, you will see a “Connect to Google” button. Click on that button, and you will be redirected to the Google authentication page.
Step 3: Authenticate with your Gmail account
To connect your Yatra events to your Google Calendar, you need to authenticate with your Gmail account. Enter your Gmail login credentials, and click on the “Allow” button to grant permission to Yatra to access your Google Calendar.
Step 4: Redirect to Yatra Google Calendar settings
After authentication, you will be redirected back to the Yatra Google settings page. Here you will see a “Logout from Google” button, which means that your setup process has been completed successfully.
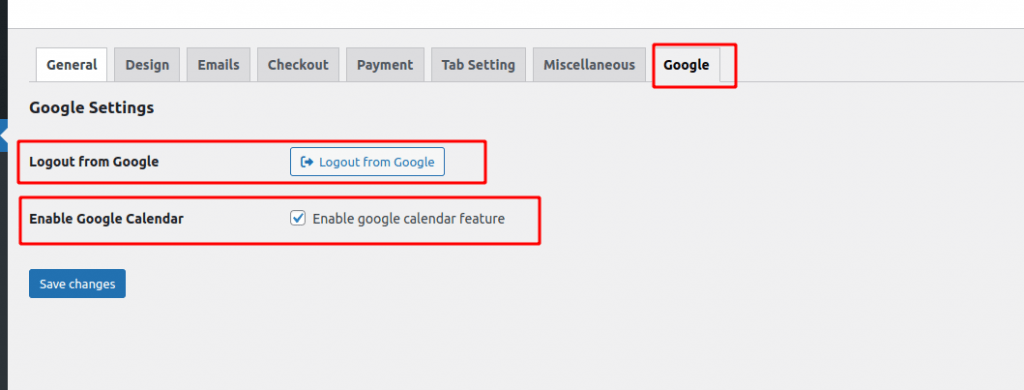
Congratulations! You have now connected your Yatra events to your Google Calendar. Now you have to enable it from Enable Google Calendar Setting and any booking from the Yatra WordPress plugin will be automatically reflected in your Google Calendar. If you have any questions or issues during the setup process, feel free to contact our support team for assistance.